This series of walkthroughs aims to help out complete beginners with finishing the CompTIA Pentest+ on the TryHackMe (thm)1 website.
It is based on the learning content provided in the Nessus room.
Task 1 - Introduction
Read the short introduction before moving to the next task.
Question 1: I have read the description!
No answer needed
Task 2 - Installation
Here, we will be installing Nessus on a kali system. (release 2022.3)
Follow the guide through the steps.
Register for the activation code.

Verify, that you actually got it sent over by checking your emails, and download the nessus program.

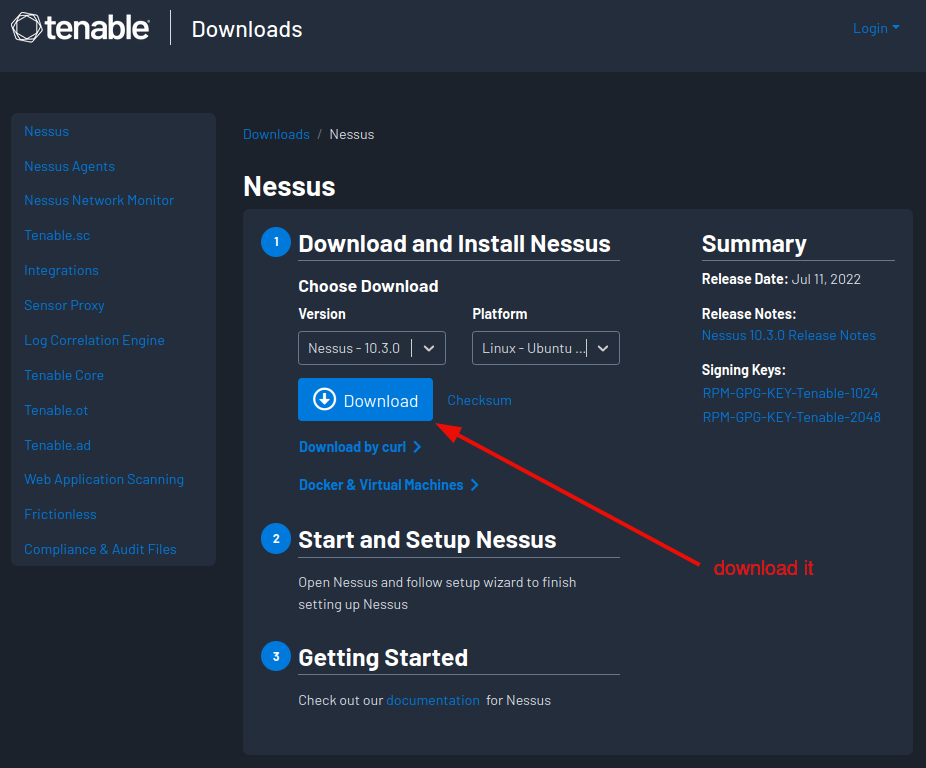
Select your platform and download the software.
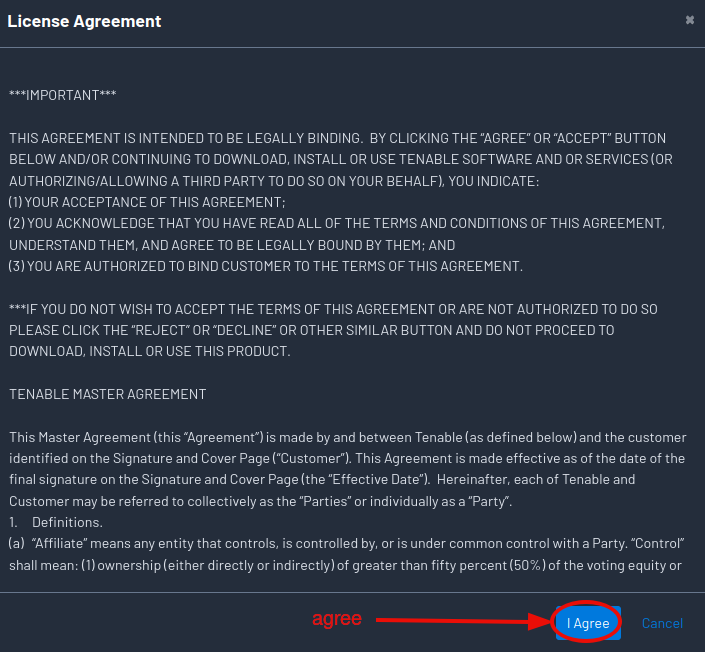
Accept the license agreement.
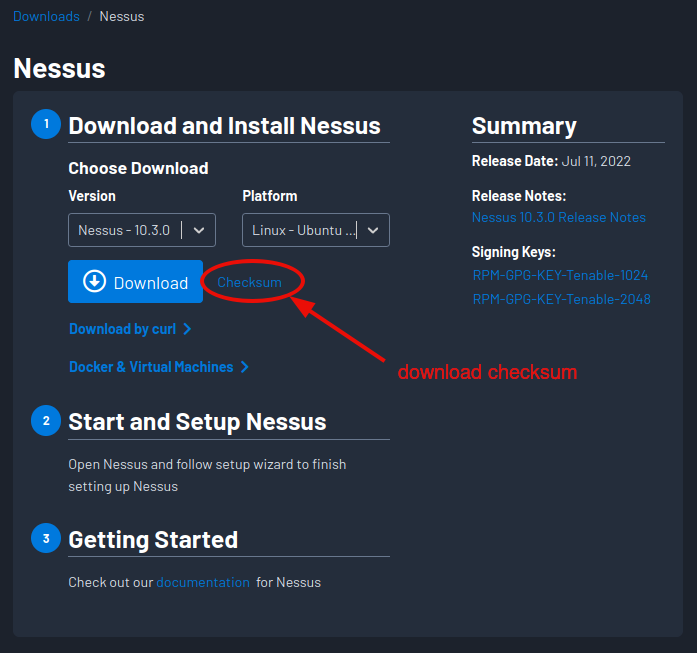
Optional - Download the checksum to verify the integrity of your software download.
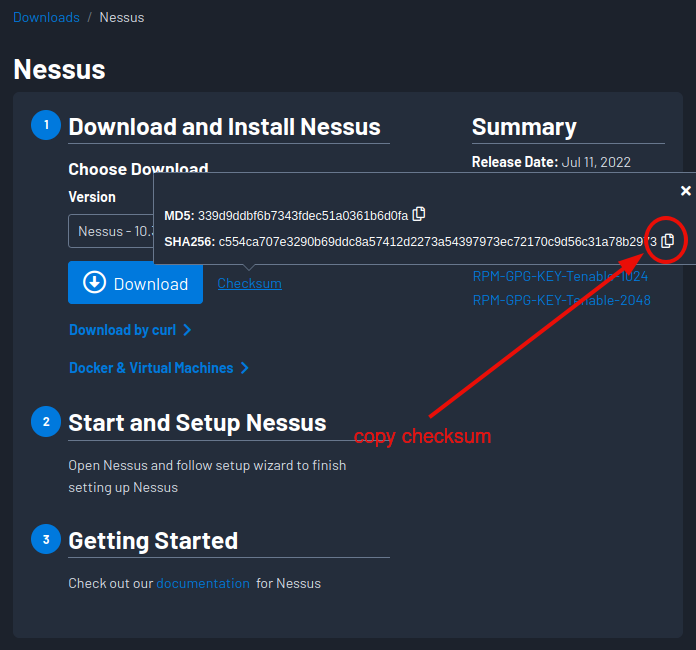
Write it to a simple text file, appended with the program’s name, and with two spaces in between. (It will allow us to use automatically check for match.)
echo "c554ca707e3290b69ddc8a57412d2273a54397973ec72170c9d56c31a78b2973 Nessus-10.3.0-ubuntu1404_amd64.deb" > nessus.hash
Then, generate the hash for the nessus .deb file (sha256sum for SHA256 hashes) and append it to our hash file. (nessus.hash)
sha256sum Nessus-10.3.0-ubuntu1404_amd64.deb >> nessus.hash
Finally, you can either manually verify, that the hashes are a match, by simply checking the hash file,
cat nessus.hash
or by using the sha256sum’s built-in check function.
sha256sum --check nessus.hash
Complete terminal interaction:
┌──(bluewalle@kali)-[~/walkthroughs/thm/comptia-pentest-plus-path/penetration-testing-tools-module/nessus-room]
└─$ echo "c554ca707e3290b69ddc8a57412d2273a54397973ec72170c9d56c31a78b2973  Nessus-10.3.0-ubuntu1404_amd64.deb" > nessus.hash

┌──(bluewalle@kali)-[~/walkthroughs/thm/comptia-pentest-plus-path/penetration-testing-tools-module/nessus-room]
└─$ sha256sum Nessus-10.3.0-ubuntu1404_amd64.deb >> nessus.hash

┌──(bluewalle@kali)-[~/walkthroughs/thm/comptia-pentest-plus-path/penetration-testing-tools-module/nessus-room]
└─$ cat nessus.hash
c554ca707e3290b69ddc8a57412d2273a54397973ec72170c9d56c31a78b2973  Nessus-10.3.0-ubuntu1404_amd64.deb
c554ca707e3290b69ddc8a57412d2273a54397973ec72170c9d56c31a78b2973  Nessus-10.3.0-ubuntu1404_amd64.deb

┌──(bluewalle@kali)-[~/walkthroughs/thm/comptia-pentest-plus-path/penetration-testing-tools-module/nessus-room]
└─$ sha256sum --check nessus.hash
Nessus-10.3.0-ubuntu1404_amd64.deb: OK
Nessus-10.3.0-ubuntu1404_amd64.deb: OK

┌──(bluewalle@kali)-[~/walkthroughs/thm/comptia-pentest-plus-path/penetration-testing-tools-module/nessus-room]
└─$
Commands used above:
| command name | description |
|---|---|
| echo | display a line of text |
| > | redirect output |
| command name | description |
|---|---|
| sha256sum | compute and check SHA256 message digest |
| –check | read checksums from the FILEs and check them |
| command name | description |
|---|---|
| cat | concatenate files and print on the standard output |
As we see, everything checks out, so we can safely proceed with the installation.
Install the package.
sudo dpkg -i Nessus-10.3.0-ubuntu1404_amd64.deb
Terminal output:
┌──(bluewalle@kali)-[~/walkthroughs/thm/comptia-pentest-plus-path/penetration-testing-tools-module/nessus-room]
└─$ sudo dpkg -i Nessus-10.3.0-ubuntu1404_amd64.deb
[sudo] password for bluewalle:
Selecting previously unselected package nessus.
(Reading database ... 371004 files and directories currently installed.)
Preparing to unpack Nessus-10.3.0-ubuntu1404_amd64.deb ...
Unpacking nessus (10.3.0) ...
Setting up nessus (10.3.0) ...
Unpacking Nessus Scanner Core Components...

 - You can start Nessus Scanner by typing /bin/systemctl start nessusd.service
 - Then go to https:/kali:8834/ to configure your scanner


┌──(bluewalle@kali)-[~/walkthroughs/thm/comptia-pentest-plus-path/penetration-testing-tools-module/nessus-room]
└─$
| command name | description |
|---|---|
| sudo | execute a command as another user – here as root |
| command name | description |
|---|---|
| dpkg | package manager for Debian – both kali and ubuntu are based on Debian |
| -i | –install package-file |
| Nessus-10.3.0-ubuntu1404_amd64.deb | package-file |
Start the nessus service.
sudo /bin/systemctl start nessusd.service
| command name | description |
|---|---|
| sudo | execute a command as another user – here as root |
| /bin/systemctl | Control the systemd system and service manager |
| start | Start (activate) one or more units specified on the command line. |
| nessusd.service | nessus daemon service |
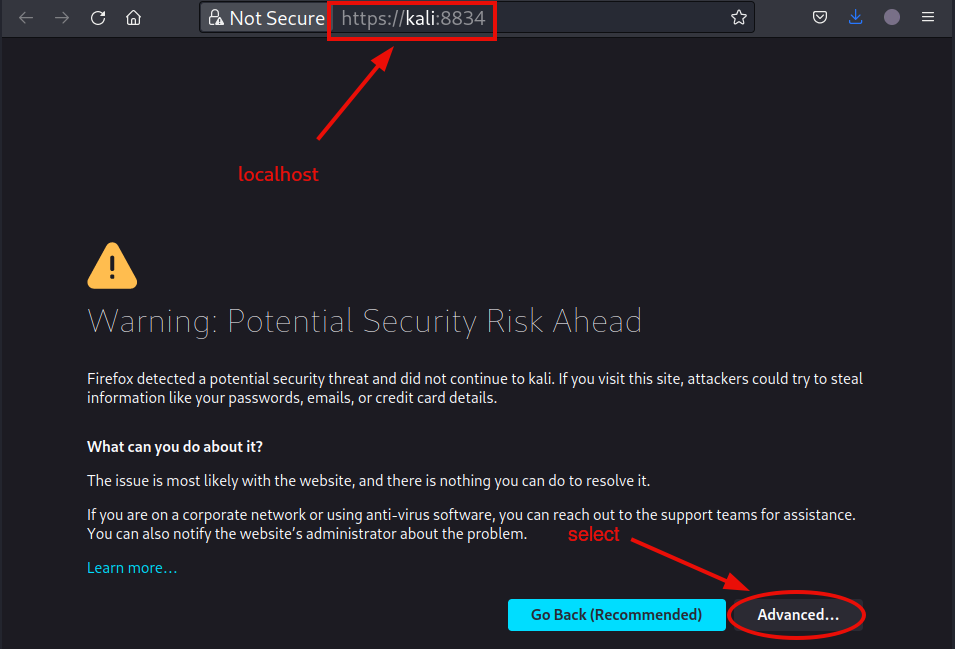
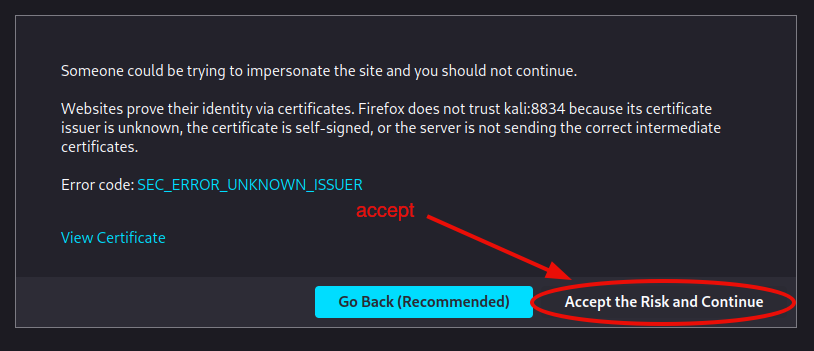
After the service daemon is started, open https://localhost:8834/ in your web browser. Here we use https://kali:8834/, because we are on a kali system, but it should not make any difference.
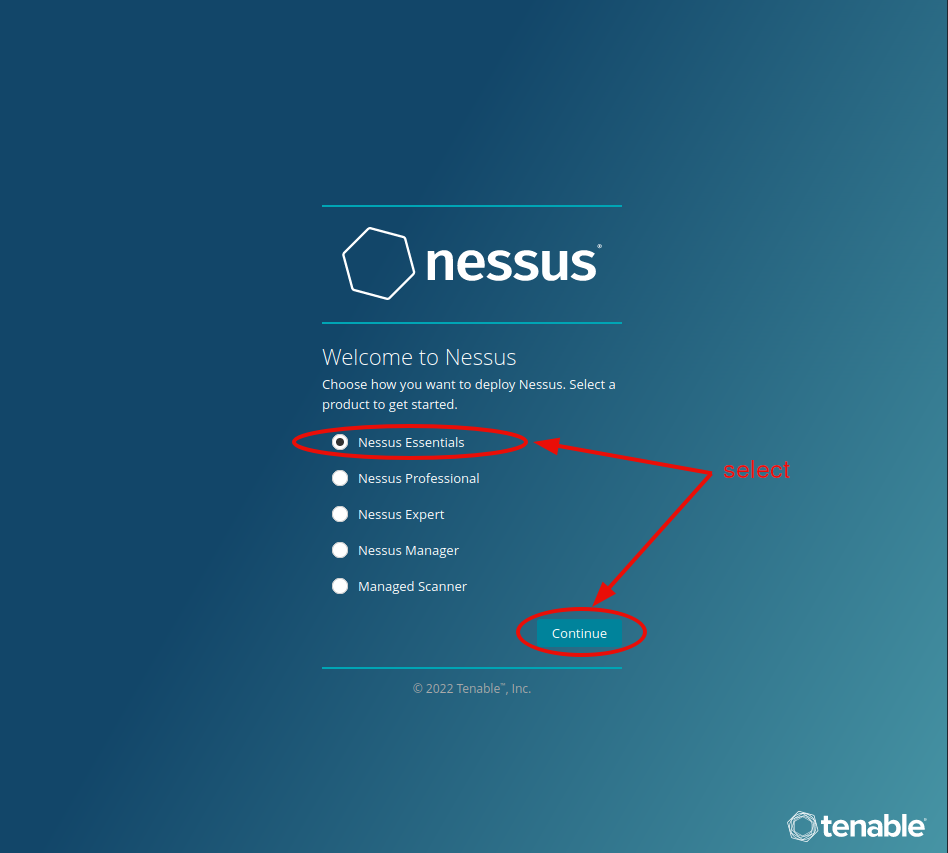
Follow the instructions through steps #5 - #8 to finish the setup.
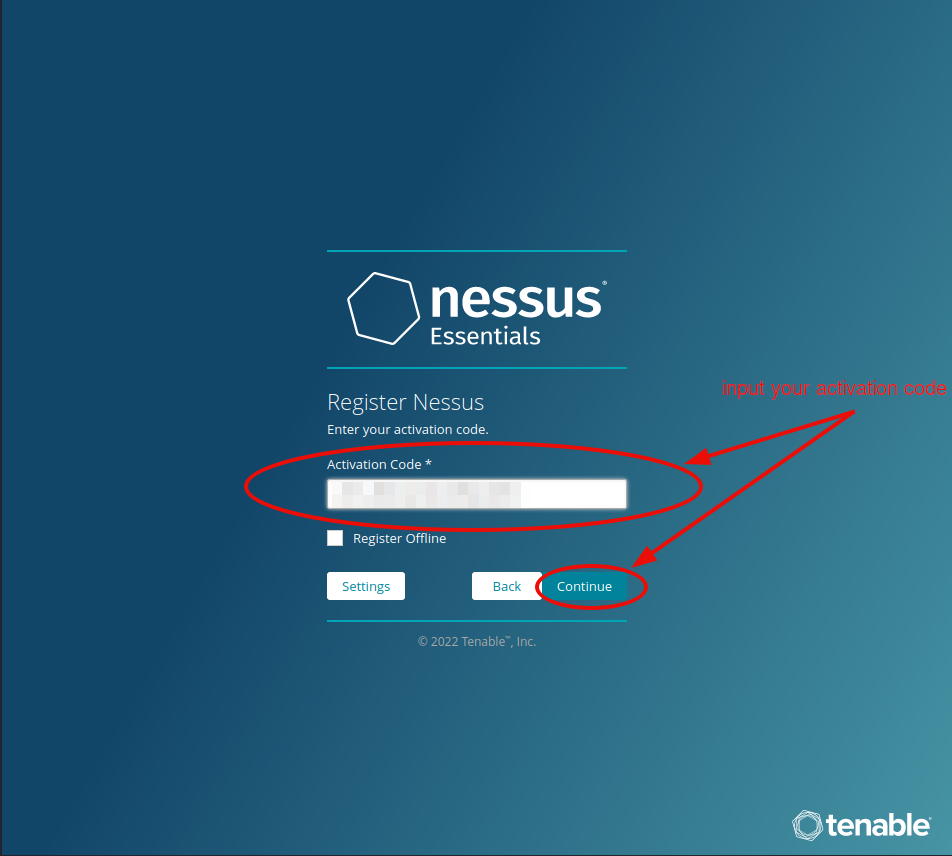
Step #6. - Set up the scanner.
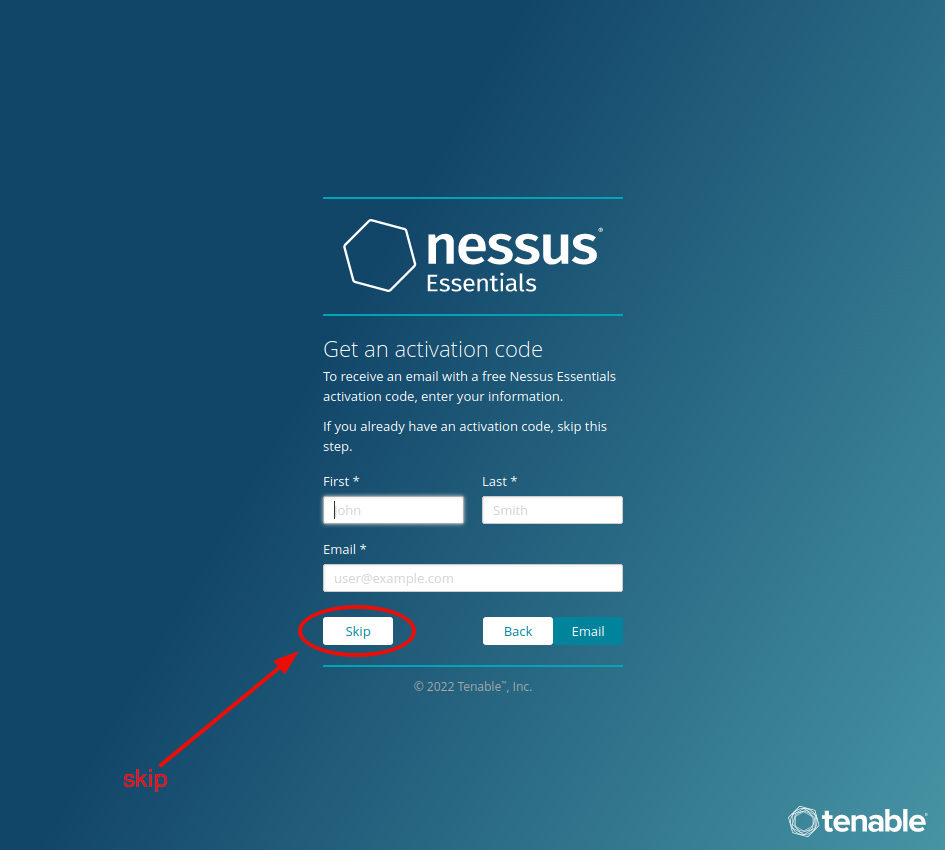
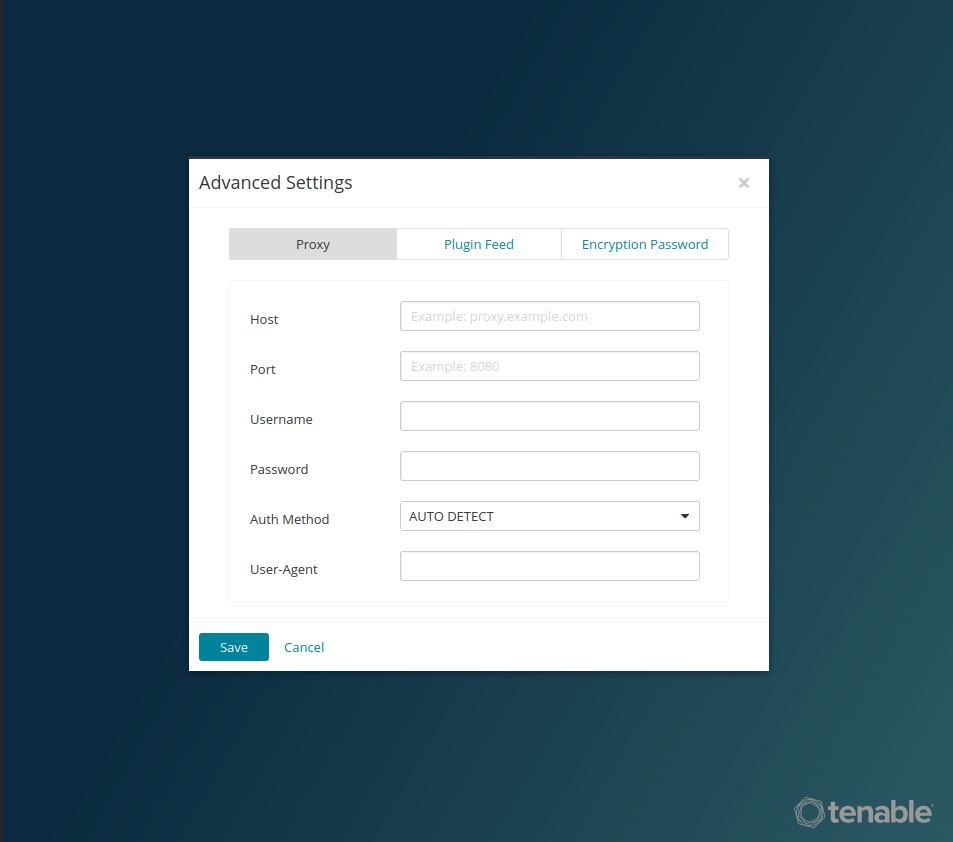
Optional - set a proxy or encryption password. (We will leave it blank here.)
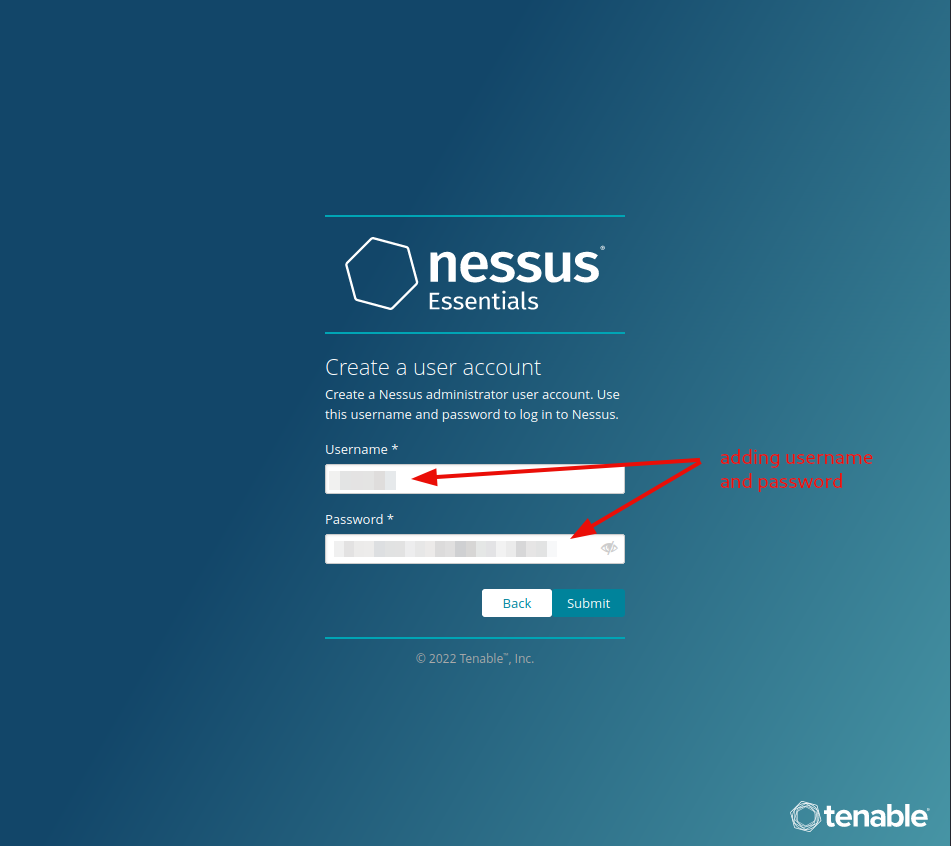
Step #7. - Create account.
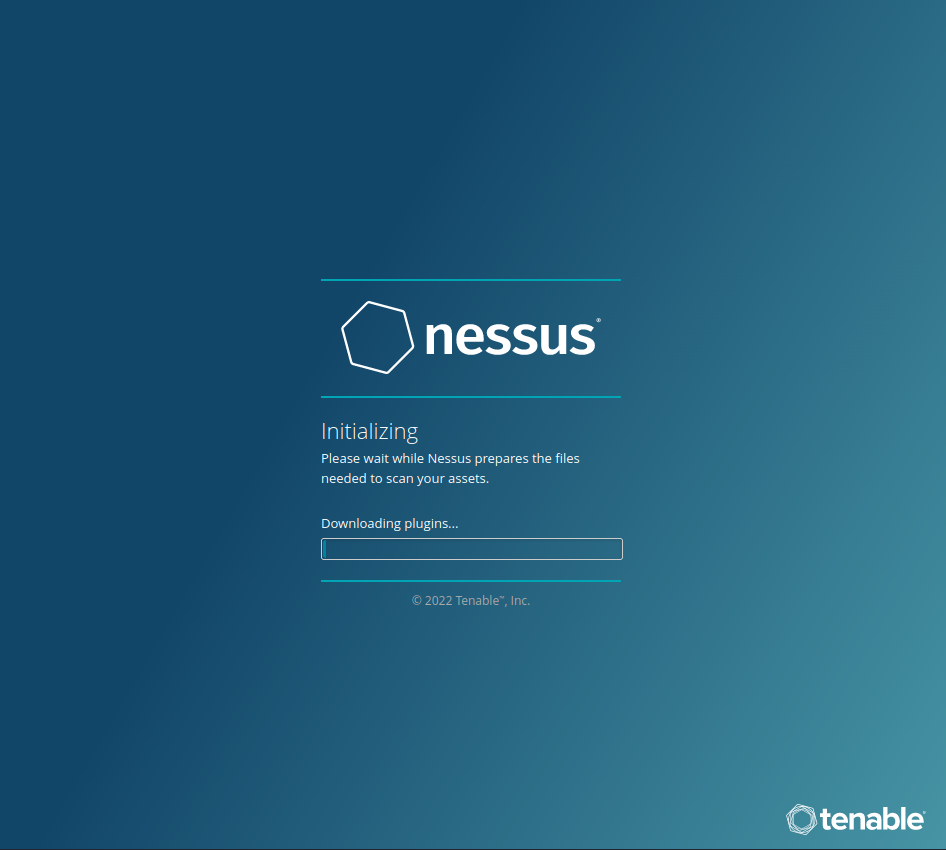
Step #8. - Install the plugins.
Step #9 and #10 - Log in with the account credentials you made earlier, and enjoy your Sucessfull install.
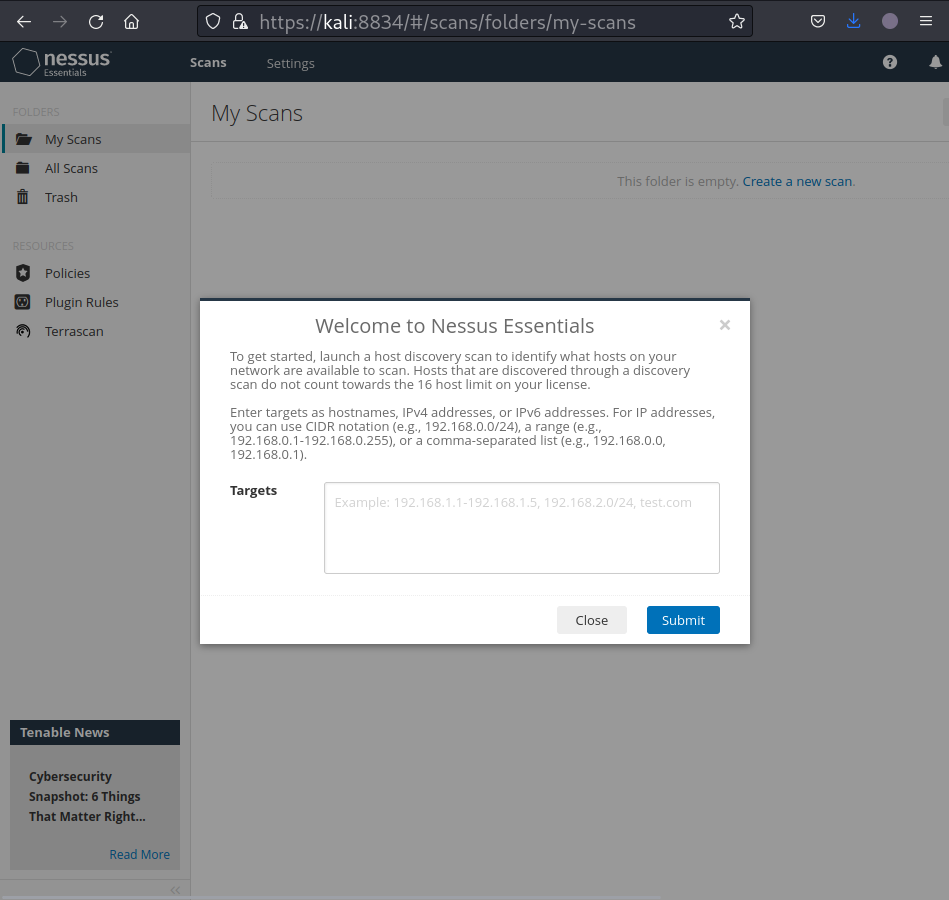
Question 1-10: Step #1-#10
No answer needed
Task 3 - Navigation and Scans
Answer the questions by moving around the site.
Question 1: What is the name of the button which is used to launch a scan?
New Scan

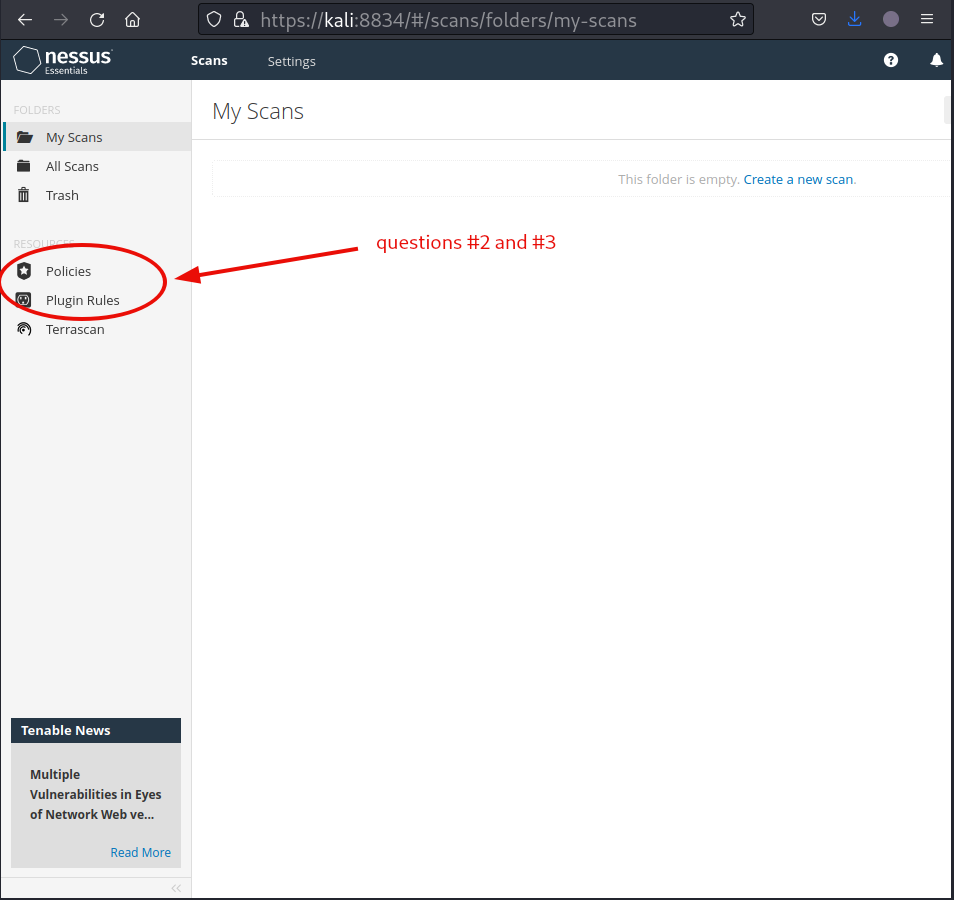
Question 2: What side menu option allows us to create custom templates?
Policies
Question 3: What menu allows us to change plugin properties such as hiding them or changing their severity?
Plugin Rules
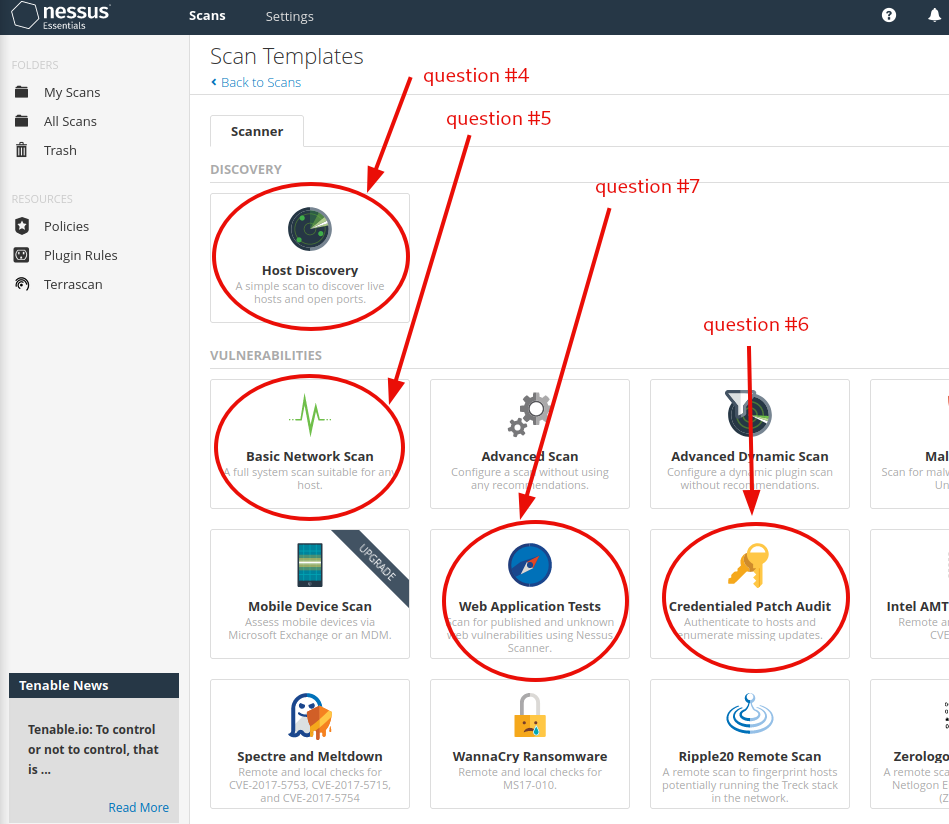
Question4: In the ‘Scan Templates’ section after clicking on ‘New Scan’, what scan allows us to see simply what hosts are alive?
Host Discovery
Question 5: One of the most useful scan types, which is considered to be ‘suitable for any host’?
Basic Network Scan
Question 6: What scan allows you to ‘Authenticate to hosts and enumerate missing updates’?
Credentialed Patch Audit
Question 7: What scan is specifically used for scanning Web Applications?
Web Application Tests
Task 4 - Scanning!
Remember to start the machine, before doing any of the scans. Create a new scan; set the target, and configure the scan parameters.
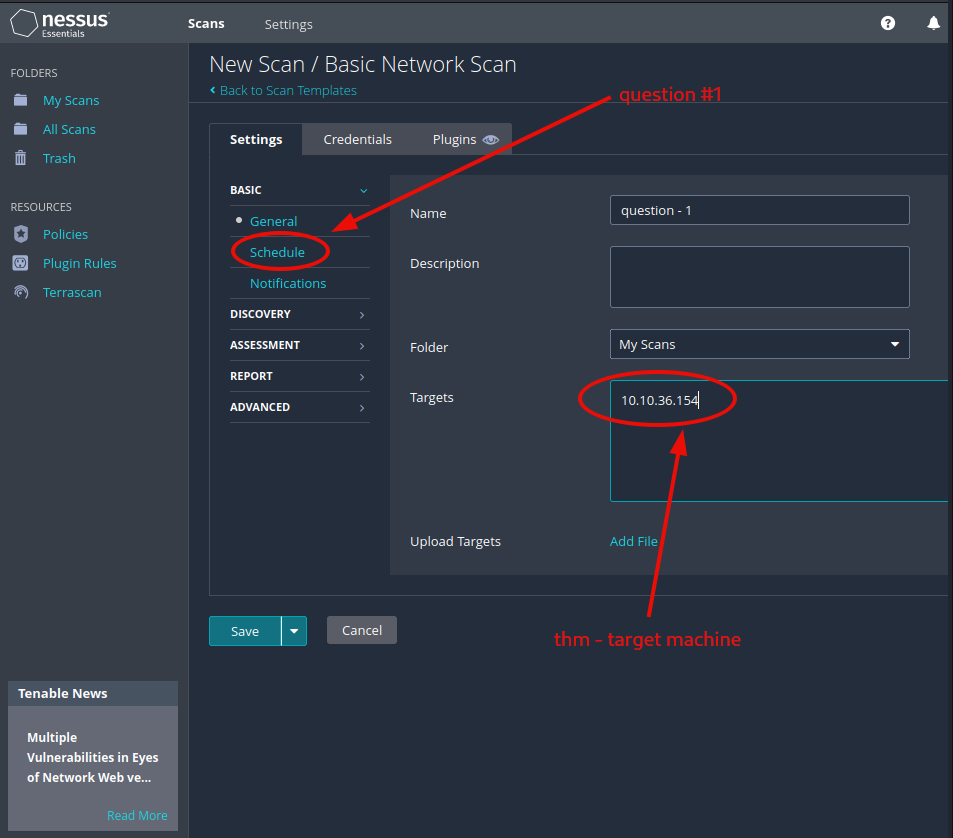
Launch the scan, and check out the reported vulnerabilities.
Question 1: Create a new ‘Basic Network Scan’ targeting the deployed VM. What option can we set under ‘BASIC’ (on the left) to set a time for this scan to run? This can be very useful when network congestion is an issue.
Schedule
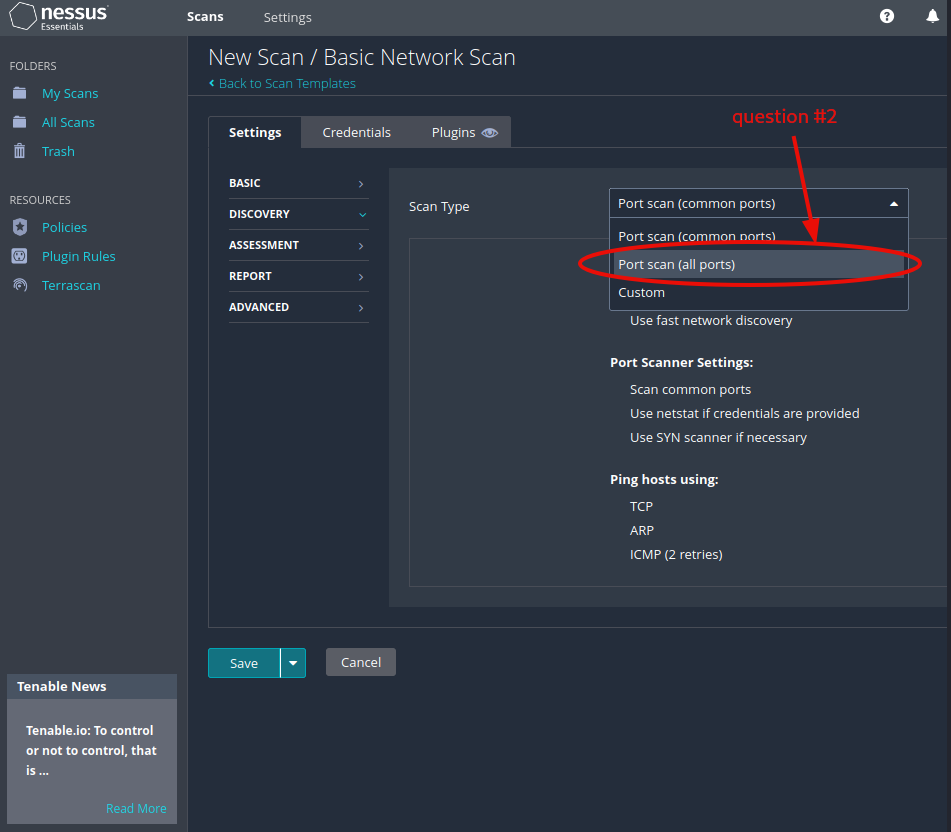
Question 2: Under ‘DISCOVERY’ (on the left) set the ‘Scan Type’ to cover ports 1-65535. What is this type called?
Port scann (all ports)
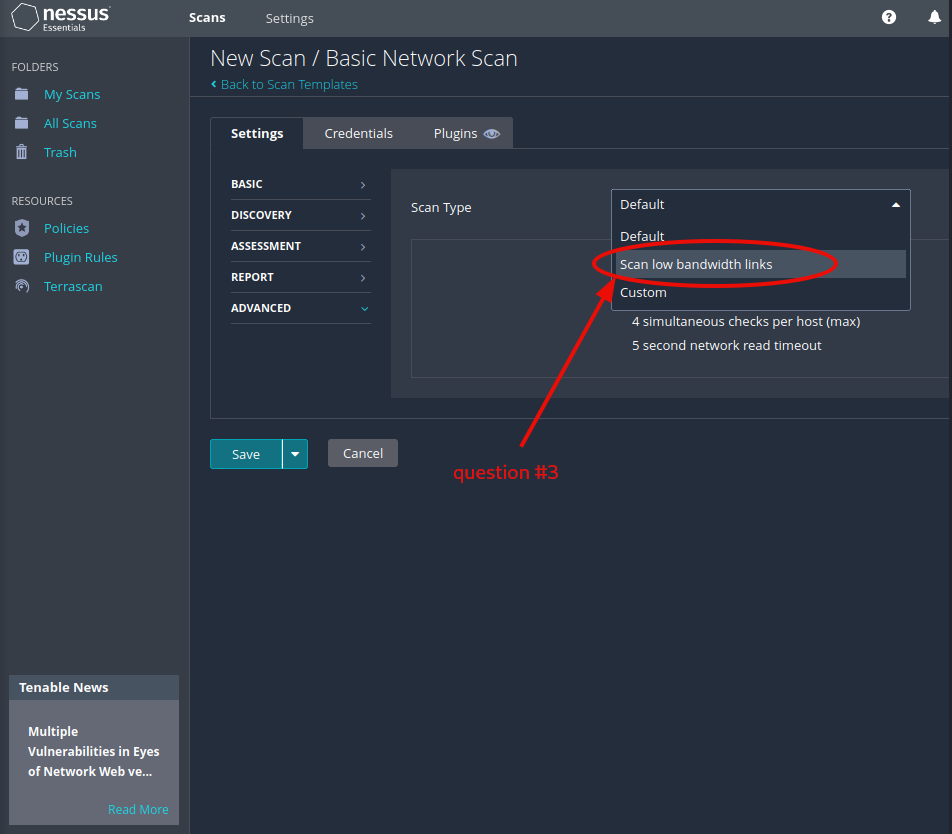
Question 3: What ‘Scan Type’ can we change to under ‘ADVANCED’ for lower bandwidth connection?
Scan low bandwidth links
Question4: With these options set, launch the scan.
No answer needed
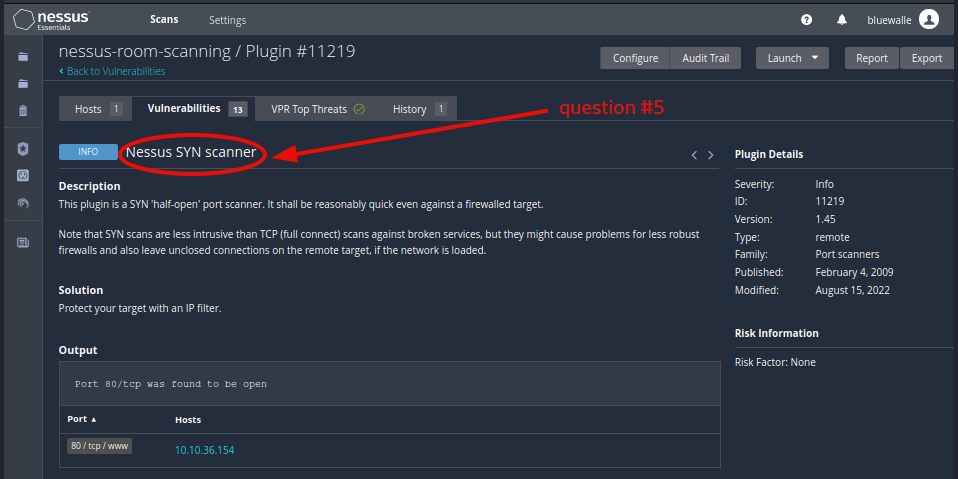
Question 5: After the scan completes, which ‘Vulnerability’ in the ‘Port scanners’ family can we view the details of to see the open ports on this host?
Nessus SYN scanner
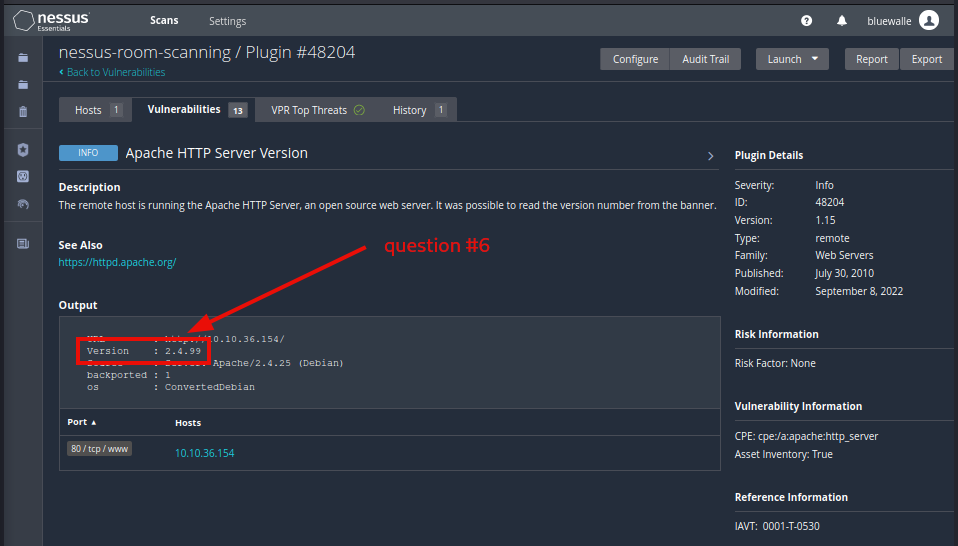
Question 6: What Apache HTTP Server Version is reported by Nessus?
2.4.99
Task 5 - Scanning a Web Application!
Make sure, that started machine is still running. Launch a new Web Application scan. Once the results are in, try to answer the questions.
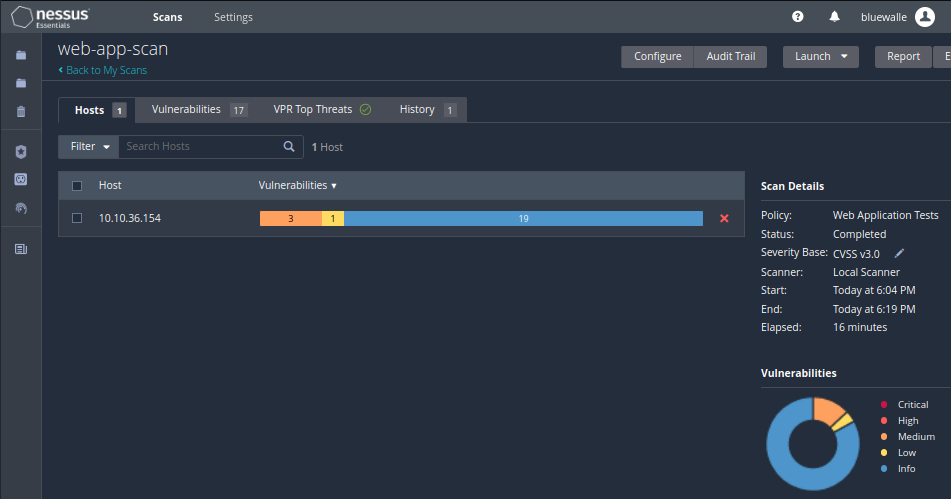
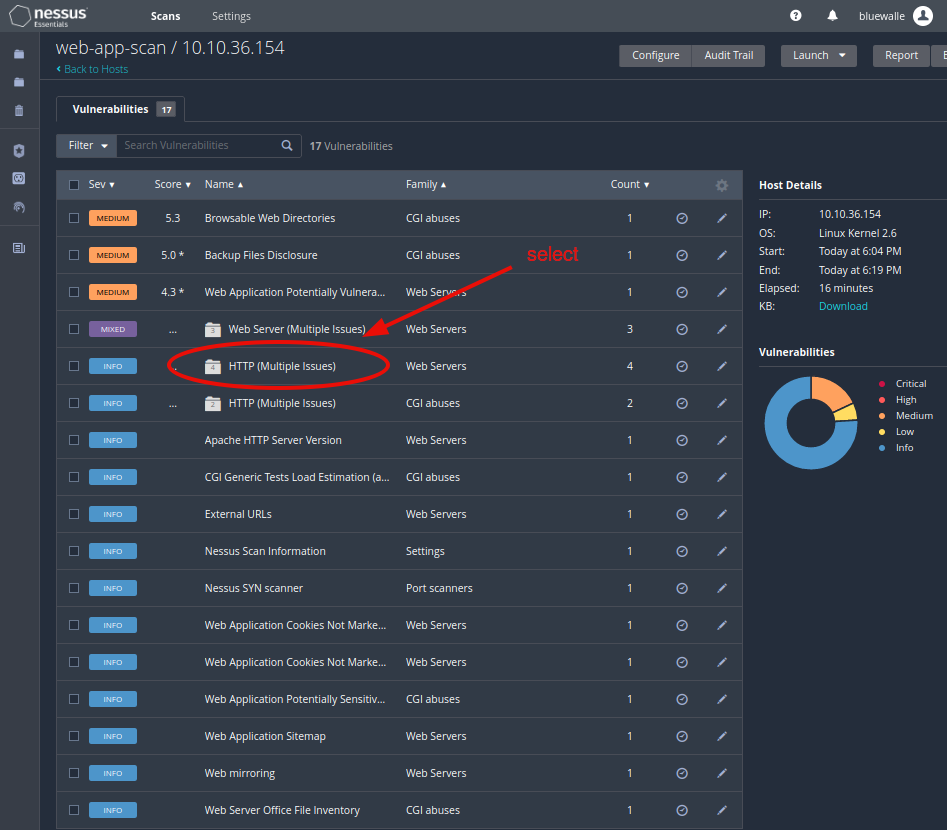
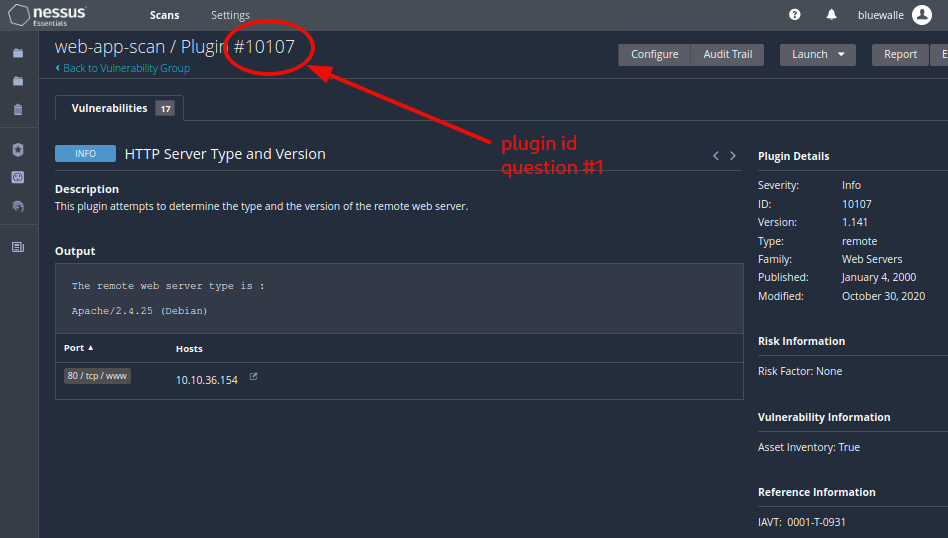
Question 1: What is the plugin id of the plugin that determines the HTTP server type and version?
10107
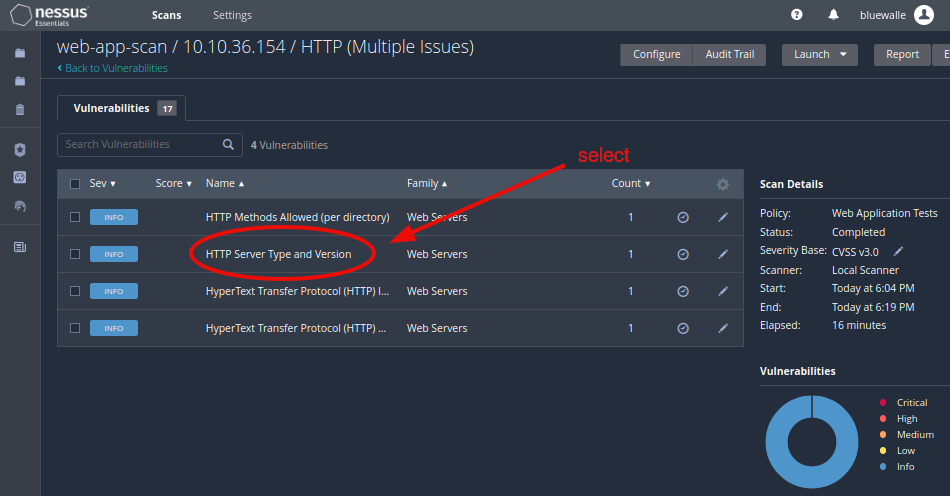
For the first one, check the HTTP (Multiple Issues) in the Web Servers category.
Then, open up the one called HTTP Server Type and Version.
You will find the plugin id both at the page top, and on the right side under plugin details.
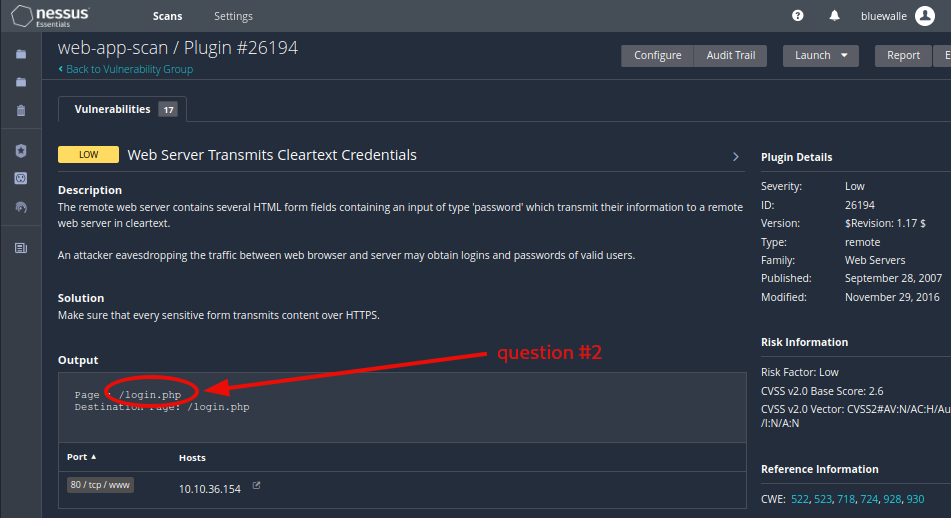
Question 2: What authentication page is discovered by the scanner that transmits credentials in cleartext?
login.php
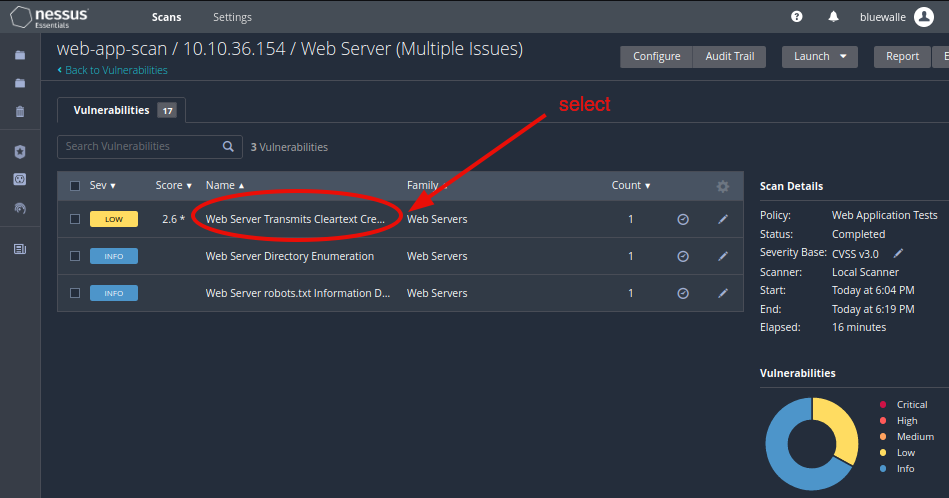
The Web Server (Multiple Issues) is the only one, containing one vulnerability with the Severity of Low.
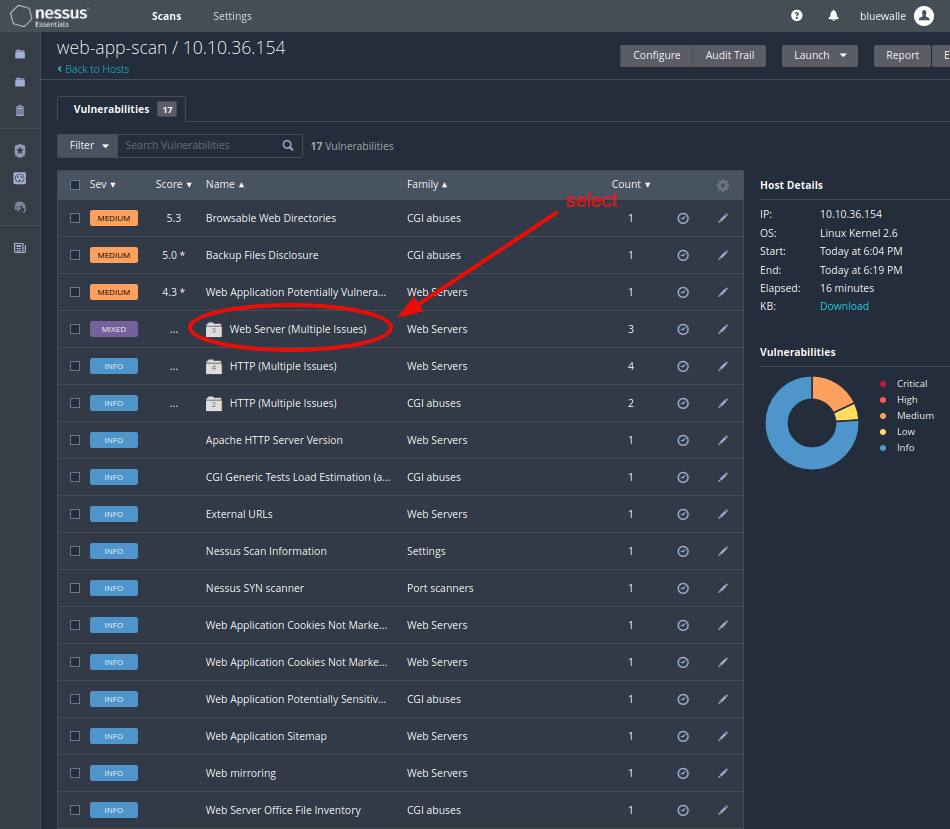
Head over, and check out the one named Web Server Transmits Cleartext Credentials.
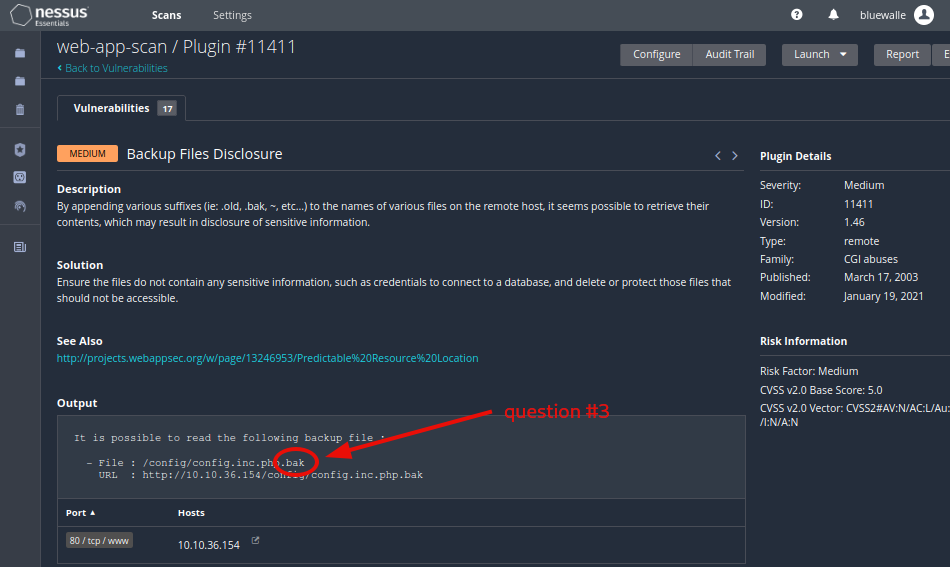
Question 3: What is the file extension of the config backup?
.bak
Under Backup Files Disclosure we will find the backup config file’s path, and it’s full name.
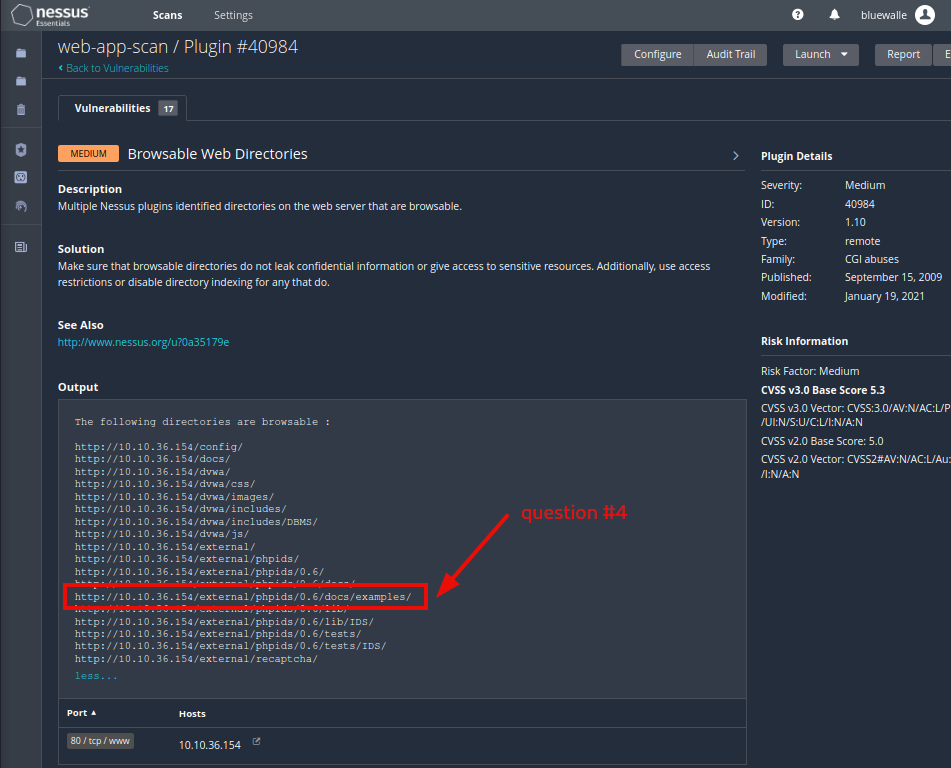
Question4: Which directory contains example documents? (This will be in a php directory)
/external/phpids/0.6/docs/examples/
Under Browsable Web Directories, you will find the directory used to store the example documents.
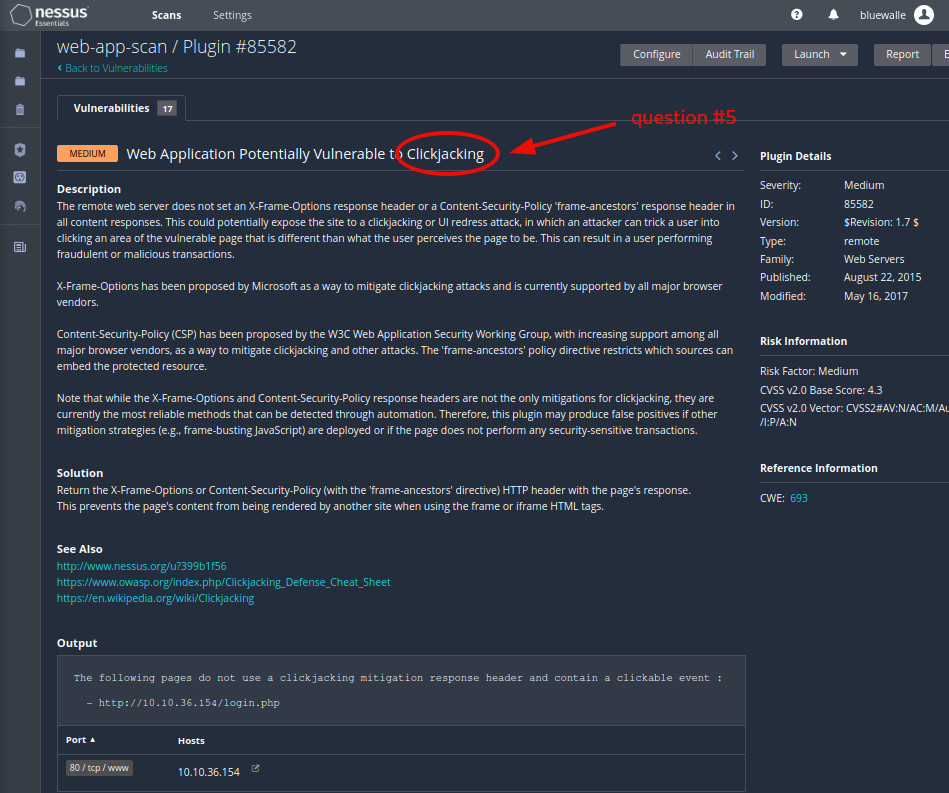
Question 5: What vulnerability is this application susceptible to that is associated with X-Frame-Options?
Clickjacking
Play around a bit, and check out the various vulnerabilities the scanner has found. Soon, you will find what you are looking for under the medium severity vulnerability called Web Application Potentially Vulnerable to Clickjacking.
This marks the end of this room. Check out the next room in the module about hydra, and learn how to bruteforce and obtain website credentials.
thm - shorthand for TryHackMe from now on ↩︎